Rheinberg illumination is an old technique which allow you to modify the color scheme of the background and your microscopic subject. A central (darkish) spot controls the background coloration and the outer annulus gives the subject its color. For example, a light blue outer annulus will give basically natural color to the subject, with an orange center stop, an orange background, with good contrast will be visible.
This technique is almost always used to image things such as snowflakes / ice crystals, salt and other transparent crystals, and many live specimens. You can learn more about it on the web, and learn about making filters from Mike Shaw.
It appears that Nikon did not include an easy way to include Rheinberg illumination in the proper place in the condensers. Some condensers can have a filter at the bottom, but they are hard to control and it is generally much better to have a condenser with a filter tray or slot as close to the iris as possible.
That being said, I did a little experimenting and found that if you place three different colors of transparent plastic (I'm using shim stock, which means the thicknesses are not constant between colors) between the vertical illuminator and the BD objective turret, if you go to darkfield mode, then each 120 degree sector is illuminated with a different color, giving a spectacular darkfield Rhienberg effect. In essence, you can see visually the local slope direction change by the change in color.
To better communicate my experimentation, I wrote an article summarizing it, published in the November 2016 issue of Micscape Magazine. The article is reprinted here.
The following diagram was shamelessly ripped off from Nikon's Microscopy U and modified to show the colored Rhienberg light path. I have a different color in each 120 degree sector, but only two are shown here.
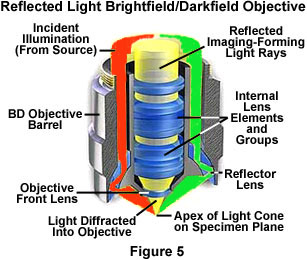

For obvious reasons, I have dubbed the reflected Rheinberg technique Disco Lights Illumination. Thanks to GaryB on photomacrography.net for including John Travolta - Perfect!.
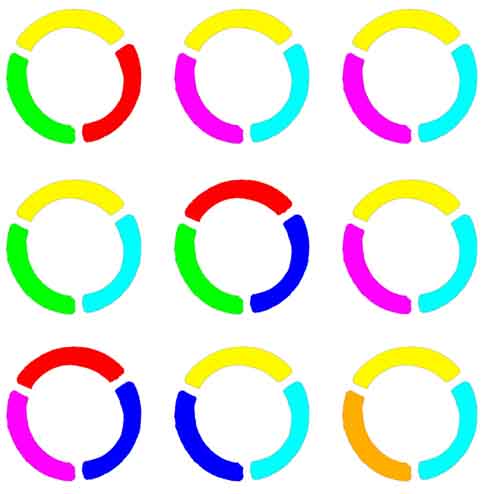
One way that I'm experimenting with is to print out on transparencies the desired color pattern, making a single filter, rather than three. This needs some more work, but this is the idea:
With a 10x BD Plan objective I looked at the very tip of a solid glass cornercube prism, which is lightly ground at all corners to protect the edges of the glass from chipping, and cutting everyone... Anyway, with this reflected darkfield Rhienberg setup, you can see the larger grinding pits and marks as sharp changes in color compared to the surroundings.

I also looked at some fossilized radiolaria (dry mounted), first with a small patch of focus on the radiolaria, and then focused on the backgound paper which is in fact dark black.


At 20x, I looked at a damaged pad area, presumably during drilling, of a bare CCD chip. Can you tell which one is using the darkfield Rheinberg?


A similar subject is a CMOS camera sensor, at 40x (single image, cropped).

Here is some moss that, of course, is very 3-D. A focus stack was not easily done, so here is an animated GIF going through focus. It is 22 frames with a 10x BD Plan objective. (10.3 MB)
Using better software that he wrote (Zerene Stacker), Rik Littlefield was able to put together the frames of my animation, and recreate the 3D nature (7.3 MB .gif), with absolutely stunning effect!

This is an interesting one - in some ways, one of my best images yet. It is sunflower pollen at 100x reflected Rheinberg, with 8 images stacked with the brightest pixel coming through. 100x with anything is pretty hard, and darkfield makes it very difficult - there just isn't much light. This required some unique camera settings to even get anything, and I'm told that pollen is a difficult subject, so overall, I'm pretty pleased with this image. I think that it looks better when made smaller than the large image presented here (by clicking and viewing full resolution - the image displayed on this page is OK, as far as I'm concerned).

And with the 20x ED Plan objective, some mold on a petri dish looks like this (err... not really, but this is a very surreal shot, so I included it.). It is a stack of 93 images, with the brightest pixel coming through. Trippy!

I also present the mold as an animated .gif, for your viewing pleasure. (35.9 MB .gif).
Sometimes it is hard to get it to look good in the camera, but seeing it through the eyepieces is just spectacular. Here is a quick shot of a moth wing, showing the scales, and in particular, one that broke off shows up really well in the darkfield. The first is a single image that has been cropped, and the second is a composite created by stacking 34 images, and then stacking two stack methods (bright/dark) over each other.


Even in the instances where regular brightfield looks great, this technique can really make a picture "pop"! This is the mint mark ("D" for Denver) on a US nickel wiht a 10x BD objective. The Reinberg image has been focus stacked.


Another subject that was very 3-D was a piece of fresh, unmounted snake skin. This is full-resolution, but cropped.

I also looked at the glass left behind after diamond tool Dremel cutting. Here is a focus stack (brightest pixel) of 7 images. Abstract Micro-Art!

Similarly, with different colors, is a nine image focus stack average of textured black plastic (the lid of an objective container, actually!). Also, with a 5x objective, the open "water bags" of a freshly cut tomato, as a cropped single image.


Silicon carbide is a very hard material, used for grinding and dressing other tools. Here we see a 10x DLI with RBG shim stock.

If you are familiar with "Gorilla Glue" you are aware that it cures in the presense of a little water, expanding significantly into an almost foam-like hard substance. Microscopically, it is full of air bubbles, which look amazing in DLI!
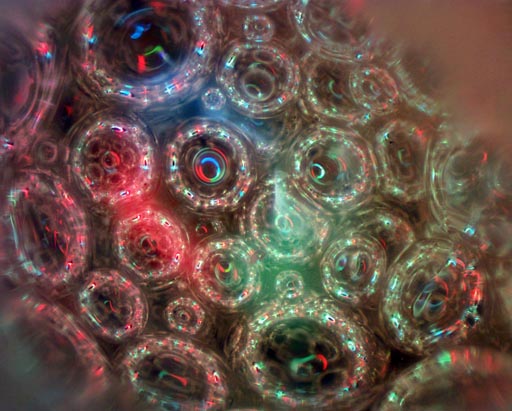
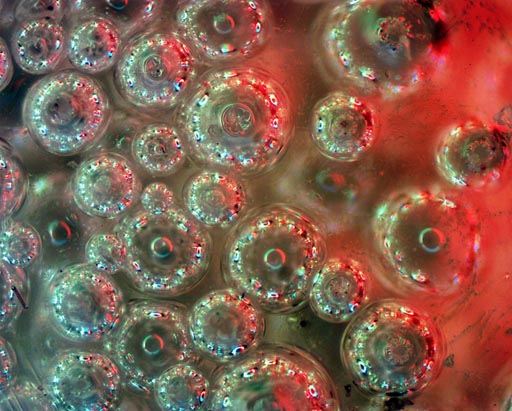
A very interesting subject for epi-illumination, but particularly darkfield, are plastic objects made on a 3D printer. This is ABS black plastic that was a failed print, but shows the lightweighting honeycomb structure. The images below are brightfield and reflected Rheinberg of the same area. The void at the top is one of the honeycomb holes.


I'm going to try some post-processing and see if I can get slope vector data from the three colors. Could be interesting, especially with images such as the radiolaria background texture. With any luck, I'll be able to extract a surface height map from this image.
Well, I in fact had some luck, actually the best one was the above image, of ABS plastic 3D printed. Find out more about the results here.
Reducing the magnification on the 3-D ABS honeycomb (from a 10x objective to 5x), with a different combination of filters reveals the pattern more clearly.
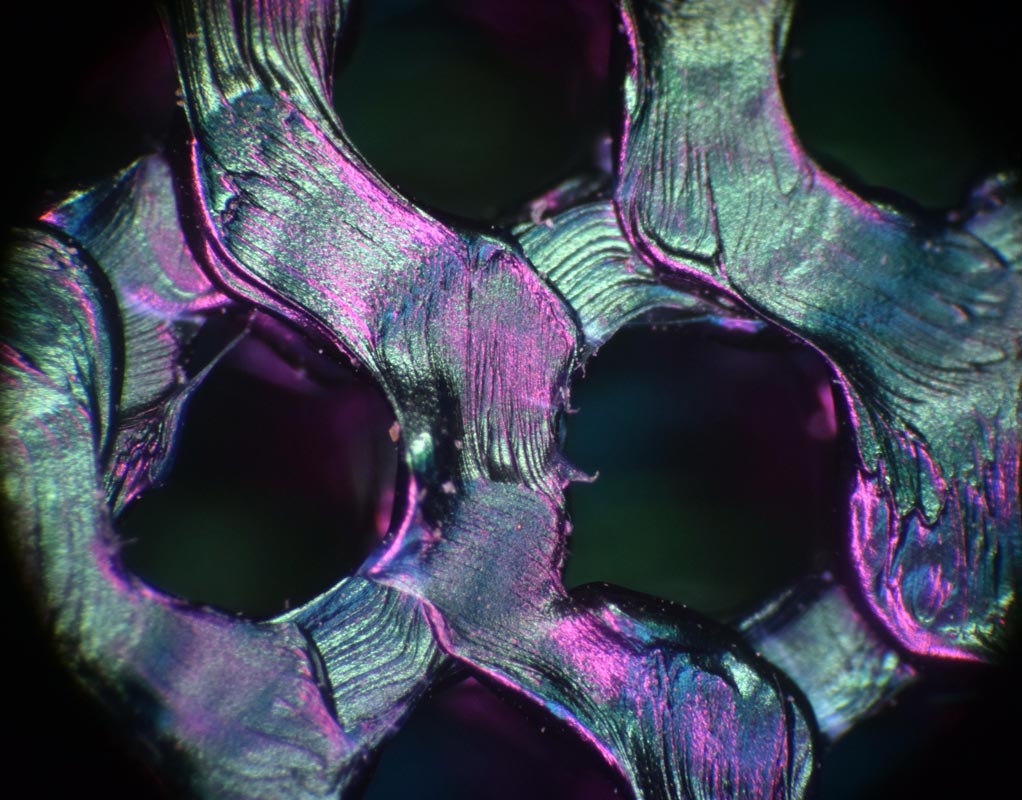
Looking at the asbestos-like fibers in a sample of ceramic refractory fiber board, with a 40x objective, shows how they are needle-like and how irritating they must be in the lungs.

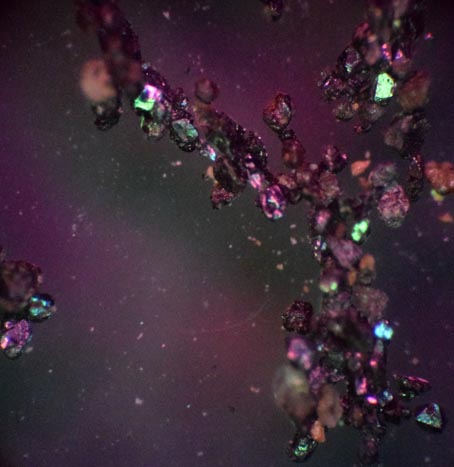
Here is a fun one! Disco Light Illumination (5x BD) of small grains of magnetic rock from the Rillito River, set to music (and I did actually get permission to use the song from Dr. Brian May). Some of those conglomerations of small rocks must have been 3 mm long, so difficult to focus on when vertical.
 (122 MB .wmv)